In this blog post I will talk about how to integrate APIs with Sitecore using Swagger.
What is Swagger?
Swagger is an open-source tool that uses Open API Specification, the initiative was started in 2015 by Linux Foundation. In my opinion, this tool saves a lot of time, it will support your development lifecycle starting with Design, Building, and Documentation.
Design Phase:
Swagger Editor will help you to design your API.
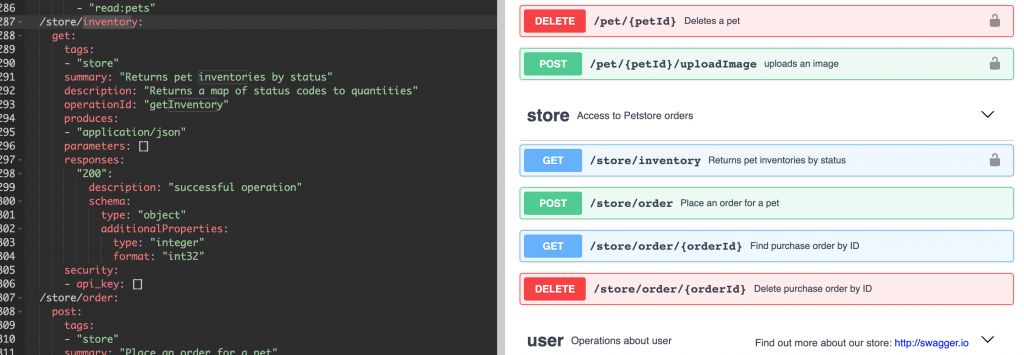
In the following example, we can appreciate that /store/inventory is a GET http method which is part of "store" section. The definition is clear and easy to understand. You can read what is the possible responses as 200 code that responds an object (Dictionary<string,int>).
Once you design the definition you are ready to go to the next phase.
Build Phase:
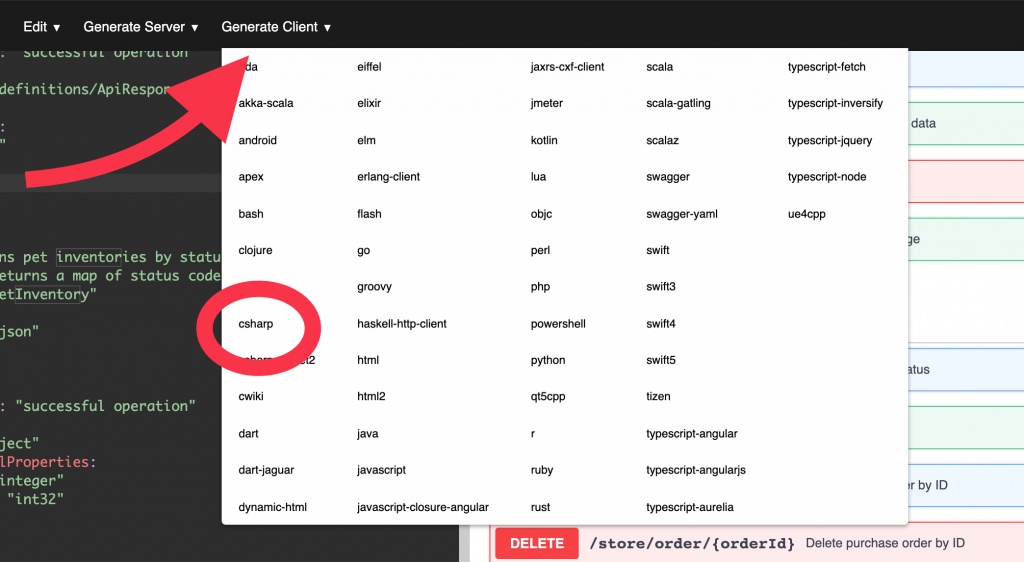
Swagger provides Swagger CodeGen to generate any Client or Server code base, this provides the interfaces where you can implement to add the API’s business logic.
Swagger editor also provide you a tab in the interface to generate this client / server code. This blog post will show you how to implement Swagger Client API with an existing Sitecore MVC Solution. In order to generate the client you will need to select from Generate client tab -> csharp.
It will generate a C# Project. That contains the following folder structure:
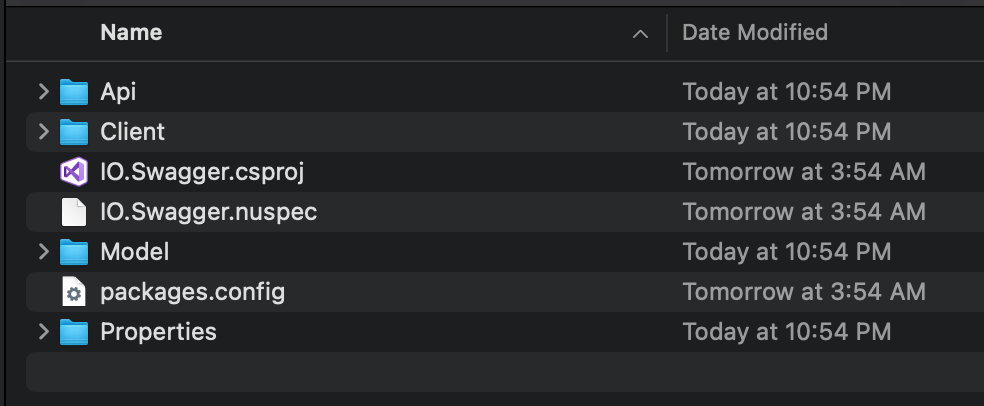
- API: Contains all Entity Interfaces, in our previous example, we had an operation GetInventory which is part of the store group. Swagger will generate a class per group, Example: StoreApi
- Client: The folder contains all classes to build the client. Basically, you will find classes like ApiCall, Configuration, Exceptions.
- Model: This is the model folder that contains all entities used in your APIs, like Pet, ApiResponse, Catalog, Product, etc.
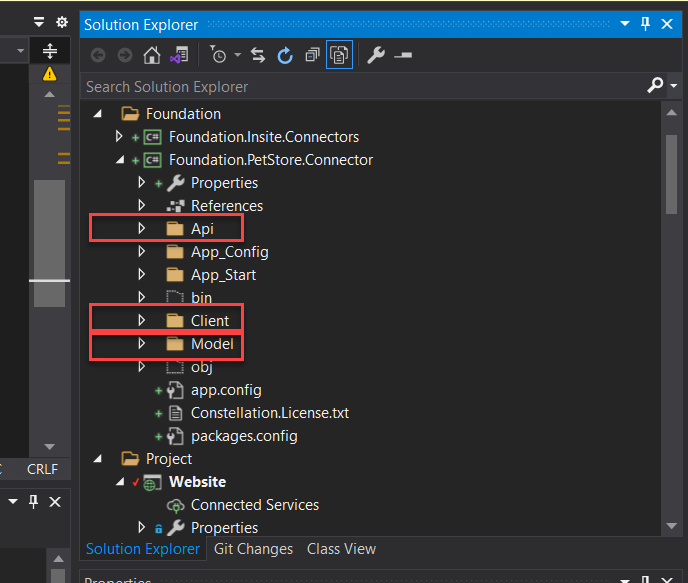
Move API, Client and Model folder to your Sitecore Solution Project.
Prepare your solution
Install the following NuGet packages on your solution:
- RestSharp
- Newtonsoft.Json
- System.ComponentModel
- System.ComponentModel.Annotations
- Sitecore.Kernel
Configure your solution
After installing all packages that are required and moved the files into the solution edit Client\Configuration.cs class in order to setup the Base URL.
  /// <summary>
        /// Initializes a new instance of the <see cref="Configuration" /> class
        /// </summary>
        public Configuration()
        {
            UserAgent = "Swagger-Codegen/1.0.0/csharp";
            BasePath = Sitecore.Configuration.Settings.GetSetting("PetStoreConnector.BaseUrl");
            DefaultHeader = new ConcurrentDictionary<string, string>();
            ApiKey = new ConcurrentDictionary<string, string>();
            ApiKeyPrefix = new ConcurrentDictionary<string, string>();

            // Setting Timeout has side effects (forces ApiClient creation).
            Timeout = 100000;
        }
Change the constructor class to include Sitecore.Configuration.Settings.GetSetting("PetStoreConnector.BaseUrl") and create a config file on Sitecore like PetStoreConnector.config
<configuration xmlns:patch="http://www.sitecore.net/xmlconfig/" xmlns:set="http://www.sitecore.net/xmlconfig/set/" xmlns:env="http://www.sitecore.net/xmlconfig/env/">
    <sitecore>
        <settings>
            <setting name="PetStoreConnector.BaseUrl" value="YOUR_BASE_PATH"/>
        </settings>
    </sitecore>
</configuration>
In your Controller you can add some code to call the API´s endpoints, here there are an example:
  public class InventoryController : Controller
    {
        public ActionResult Index()
        {
            IStoreApi api = new StoreApi();
            var inventory = api.GetInventory();
            return Json(inventory, JsonRequestBehavior.AllowGet);
        }


    }
Finally build your solution and deploy your changes and you are ready to consume your API on Sitecore using Swagger.
This approach could reduce your development time, you can easily integrate your logic with another system building a robust C# client solution.
I had the opportunity to talk in Sitecore User Group Ecuador Session 15 in the following YouTube link you can watch the session (in Spanish).
Leave a Reply